shopware – multiseller – marketplace – shopware 6

Shopware Multi-Seller Marketplace – Webkul Blog
[expand title=“mehr lesen…“]
Installation Process
Please find here the installation process with terminal:
1) Extract the zip file of the Shopware multi-seller plugin.
2) Upload the folder WebkulMVMarketplace to custom/plugins directory of your Shopware 6.

3) Now open the Shopware 6 application in the Terminal.
4) Run the following commands in the Terminal

./bin/console plugin:refresh (Insert and list the plugins) ./bin/console plugin:install –activate WebkulMarketplace (Installing and activating the plugin) ./bin/console c:c (Clearing the cache) ./psh.phar administration:build (Building the application)
| 1234 | ./bin/console plugin:refresh (Insert and list the plugins)./bin/console plugin:install –activate WebkulMarketplace (Installing and activating the plugin)./bin/console c:c (Clearing the cache)./psh.phar administration:build (Building the application) |
5) Now refresh the administration.
Please find here the manual installation process:
1) Extract the zip file of the plugin.
2) Goto your Shopware 6 installation backend panel and navigate to Setting -> System -> Plugins after that you can find all the installed plugin in it.

For installing the plugin, the user can click on the Upload Plugin button. The user can upload the plugin zip(WebkulMVMarketplace) here.
3) After uploading the plugin zip, the user can see the plugin in the list.

4) Now the user can click on the install icon to install the Shopware multi-seller plugin.

5) After the installation of the plugin, the user can click to activate the plugin.

Shopware Multi-Seller Marketplace Configuration
After installing the Shopware multi-seller plugin, the user can navigate to Setting -> System -> Plugin.

After clicking on the plugin, the user can see all the installed plugin in the Shopware. The user can click on the “…” icon for the configuration option of the plugin.

After clicking on the Config icon, the user can see these options:
Auto Approve Sellers – The admin can enable the option to auto-approve the sellers.
Auto Approve Products – The admin can enable this option to auto-approve the seller’s products.
Commission – Here the admin can set the commission percentage.
Calculate commission on tax – Enable this option so that the admin’s commission will be calculated on the product’s unit price.
Seller Product Delete Option – Enable this option so that the seller can delete the seller product.
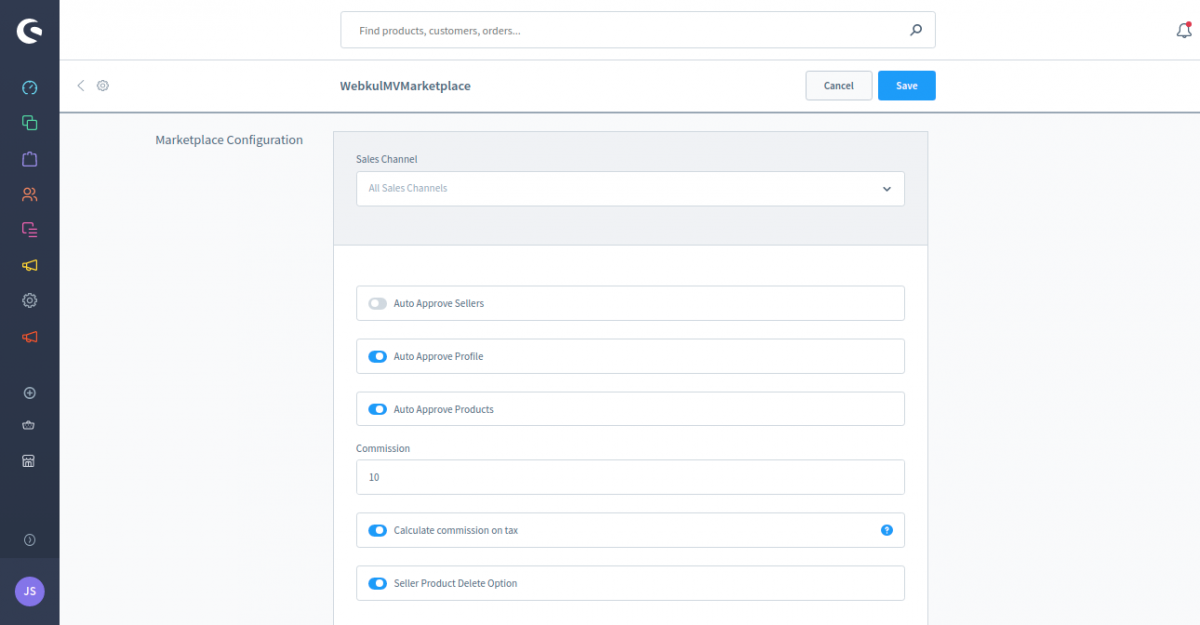
After entering the details, the admin can click on the Save button.
Shopware Multi-Seller Marketplace Admin Panel
For the Shopware Multi-Seller Marketplace admin option, the user can see the marketplace icon at left menus in Shopware6 backend.
Sellers
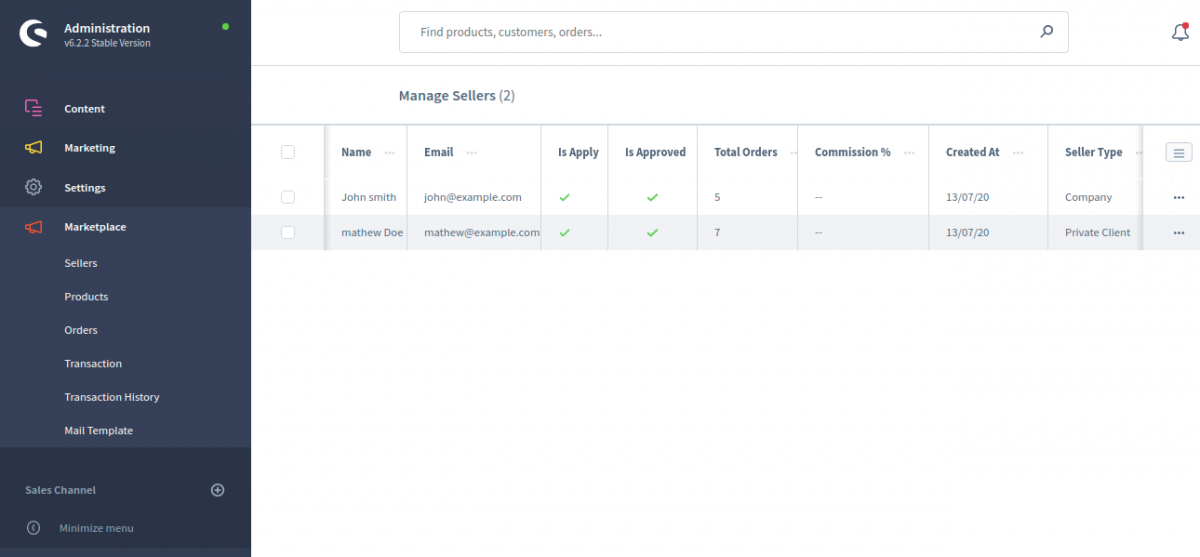
Under the seller menu option, the admin can manage all the sellers like – Approve/Disapprove them. Admin can see all the sellers register at the Marketplace. The admin can see these details in the seller’s grid.
- Name
- Is Apply
- Is Approved
- Total Orders
- Commission
- Created at
- Seller Type
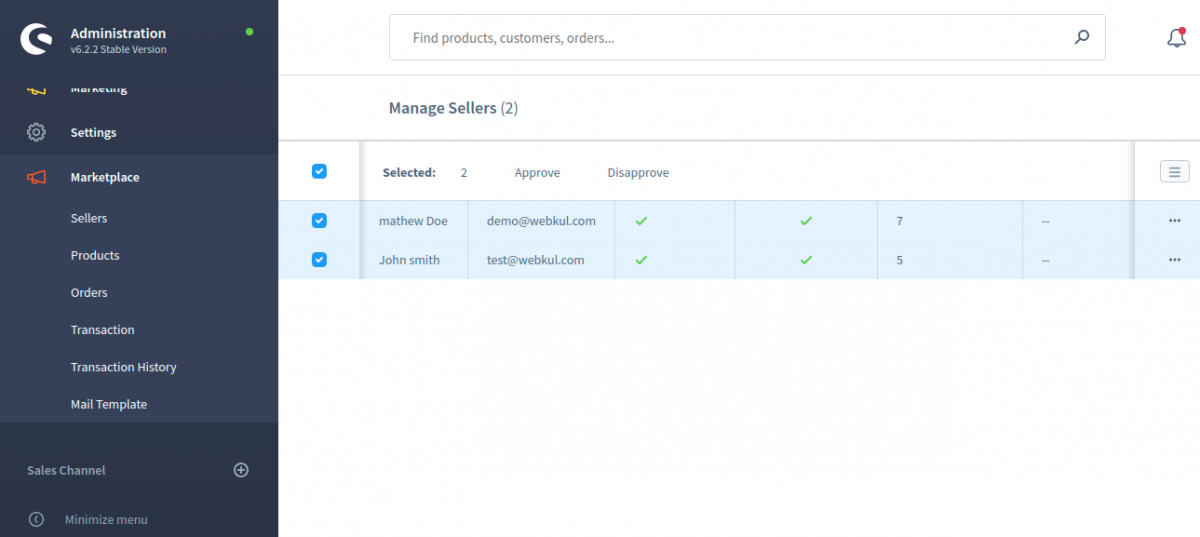
The admin can select particular and also select mass to approve or disapprove sellers on the Marketplace.
In this below image, you can see that admin selects mass seller to approve or disapprove on the marketplace.
The admin can click on the edit (…) button. Here admin can config the seller information.
Commission Percentage– Admin can define the Commission Percentage for the seller. The admin can set the commission for all the sellers. When the product will be purchased, the admin can earn the profit as a commission.
Store Logo – Admin can see the seller store logo, and can delete also.
Banner logo – Admin can see the seller store Banner logo, and can delete also.
Owner logo – Admin can see the seller store Banner logo. and can delete also.
Store logo, Banner logo and Owner logo can upload anyone in the seller end.

Profile Status – The admin can enable or disable seller profile on the Marketplace.
Seller Status – The admin can enable or disable sellers status on the Marketplace.

Products
Under this section, the admin will be able to approve one by one and also able to mass approve the store products to the seller’s account as required. Here, the admin can see all of the store products as well.
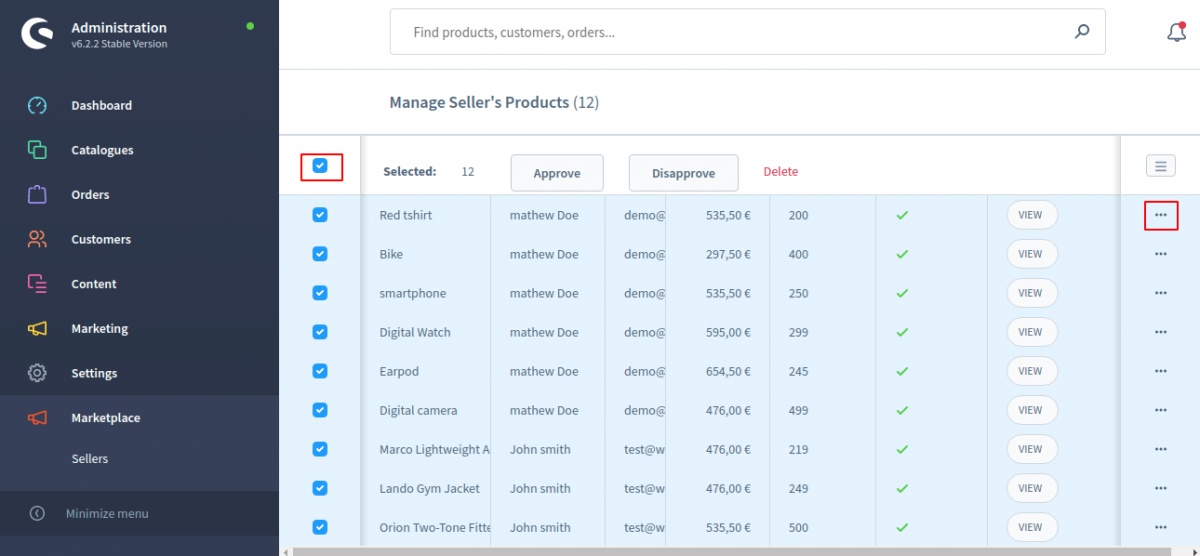
In the products, the admin can select delete, approve, and disapprove the product one by one and also select mass product in one time.
In the seller’s product grid, the admin can see these details.
- Product’s Title
- Seller’s Name
- Seller’s Email
- Price
- Stock
- Status
- Product’s View
In the below image, you can see that the admin has selected mass product to Approve, Disapprove or delete the product.
The admin can also click on the “view” button to see the products at the front-end.

Orders
Under this section, the admin can see the orders made for marketplace products. From here, the admin can view orders, change order status for each product. Also, can click on the View button, the admin will be able to see the order details of a particular order and can make changes to order as well.
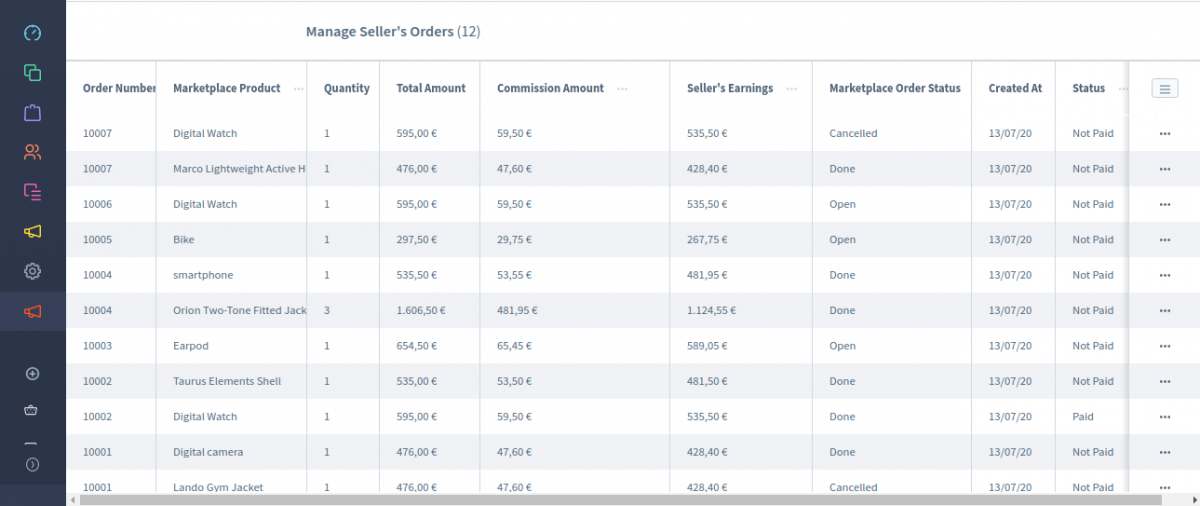
The admin can see these details in the seller’s product order grid.
- Order number
- Marketplace Product
- Quantity
- Total amount
- Commission Amount
- Seller’s Earning
- Marketplace order status
- Created at
- Status
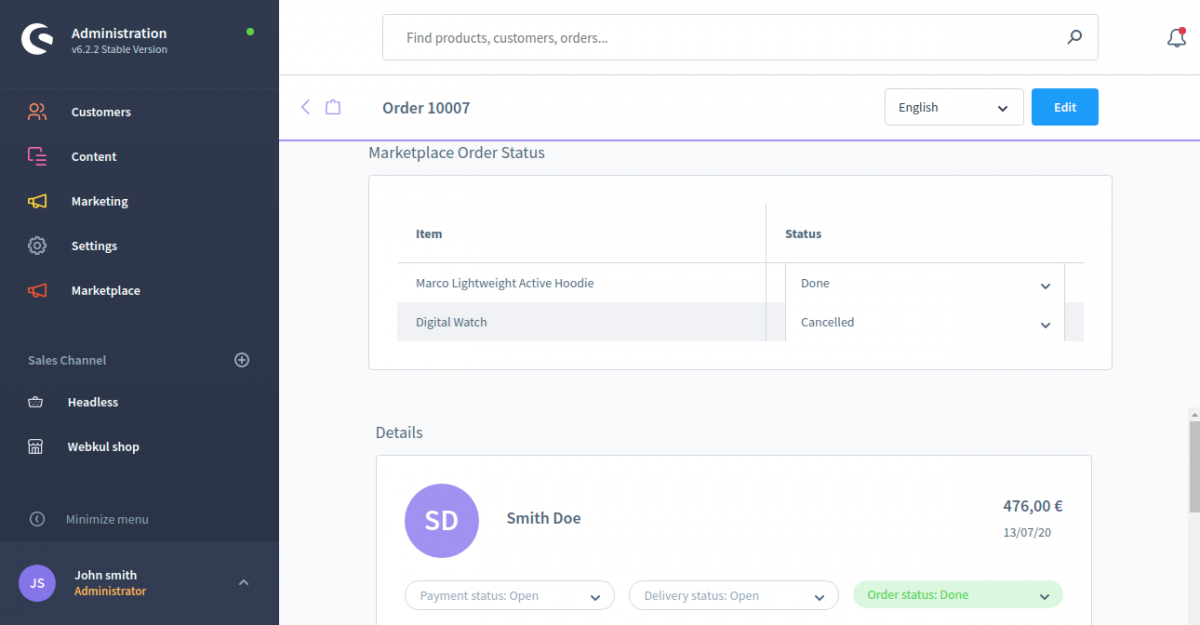
If a customer has placed any two products order, after that customer cancelled one product, so order status in admin end, one order status will show cancelled.
Price of cancelled product will get decreased from total order after cancellation of product.
Transaction
Forthwith, Under the transactions section, the admin will be able to check the transactions of all the marketplace sellers to maintain a record. When admin and seller will be done the order status, then the transaction will show in this part.
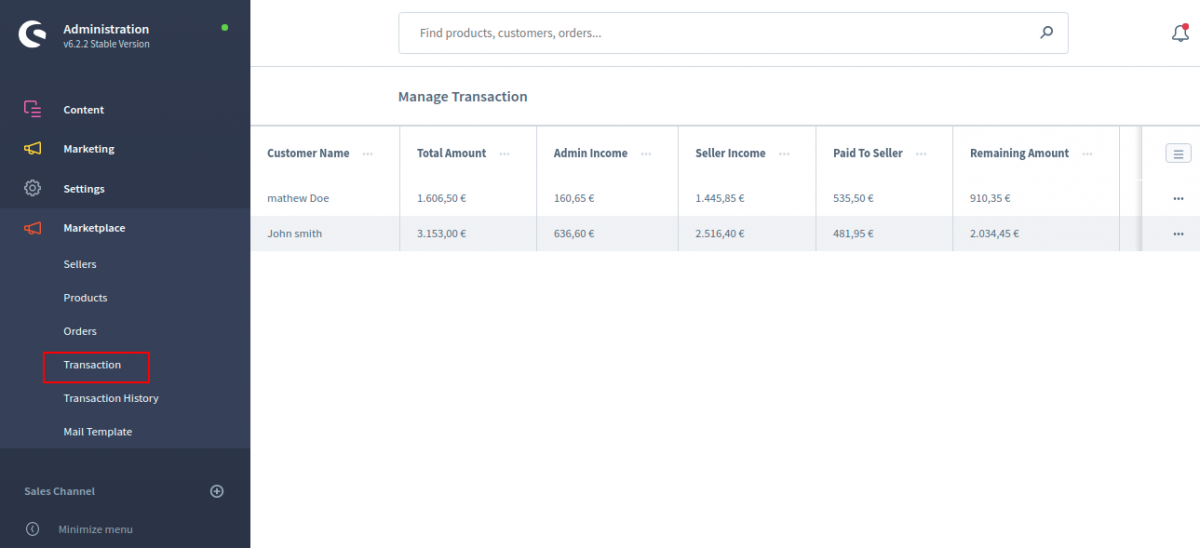
Here you can also see the details of seller’s Manage Transaction.
- Customer Name
- Total Amount
- Admin Income
- Seller Income
- Paid To Seller
- Remaining Amount
The admin can click on the edit (…) button on any customer. In this page, the admin can see the customer details –
- Order number
- Marketplace Product
- Quantity
- Total Amount
- Commission Amount
- Seller’s Earnings
- Created At
- Status
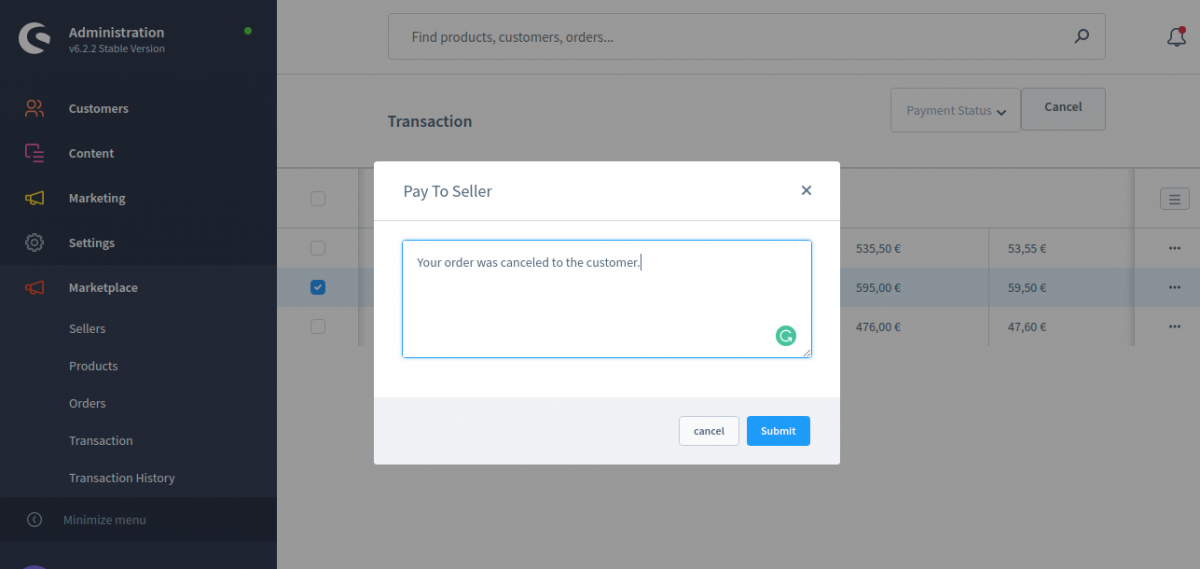
In the payment status, the admin can filter to select paid or unpaid. The admin can select one or multiple transitions for pay to the seller. In the below image, you can see the paid.

Here you can see the unpaid transitions.
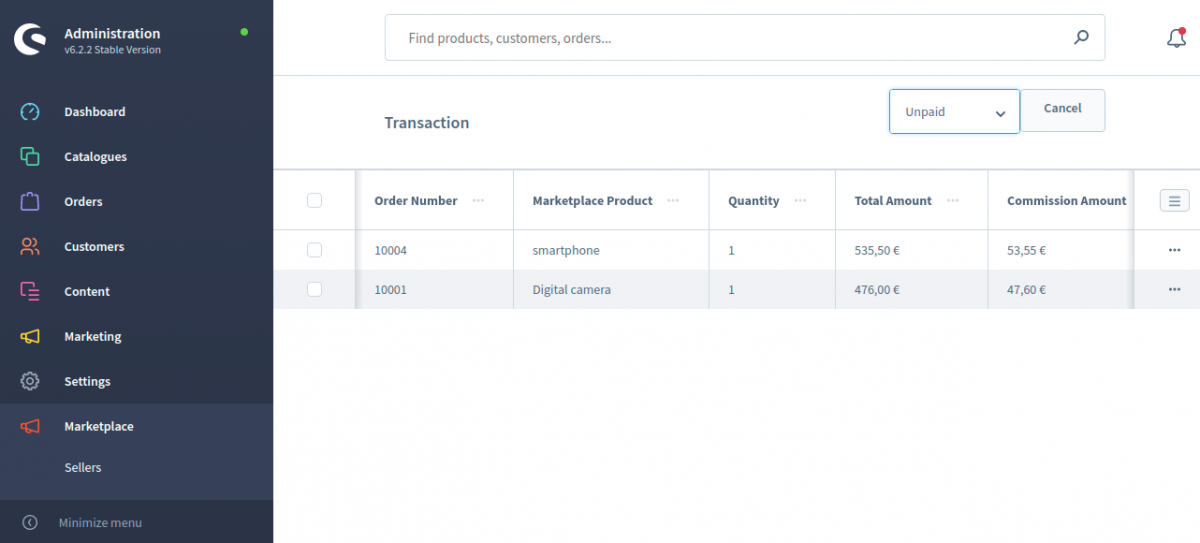
When admin will pay to seller, then admin can write a note for the seller, after that click on the submit button.
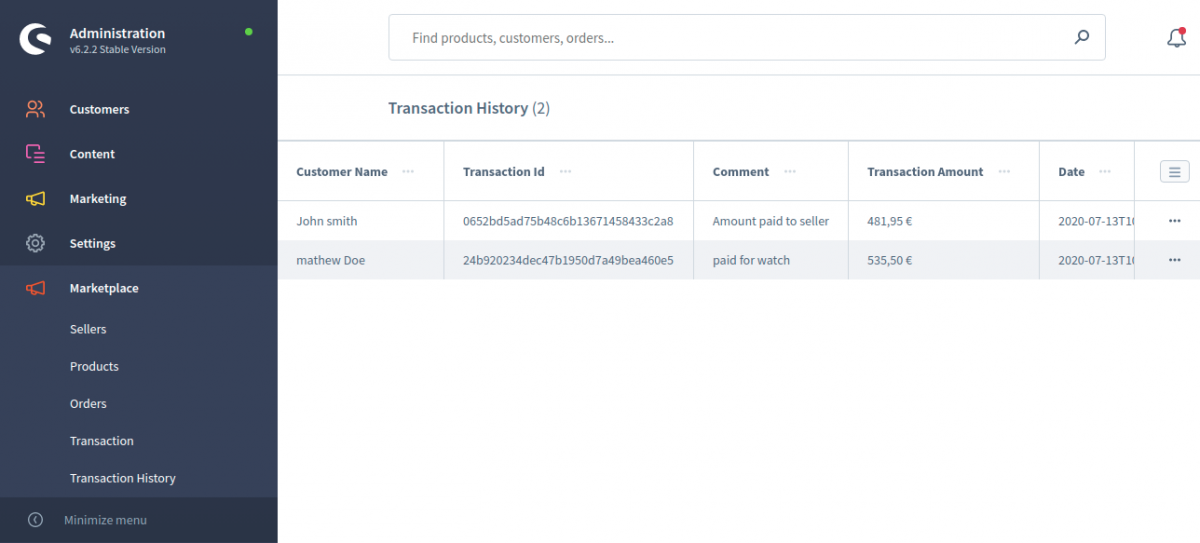
Transaction History
In the Transaction history, the admin see the seller’s translation details.
- Customer Name
- Transaction Id
- Comment
- Transaction Amount
- Date
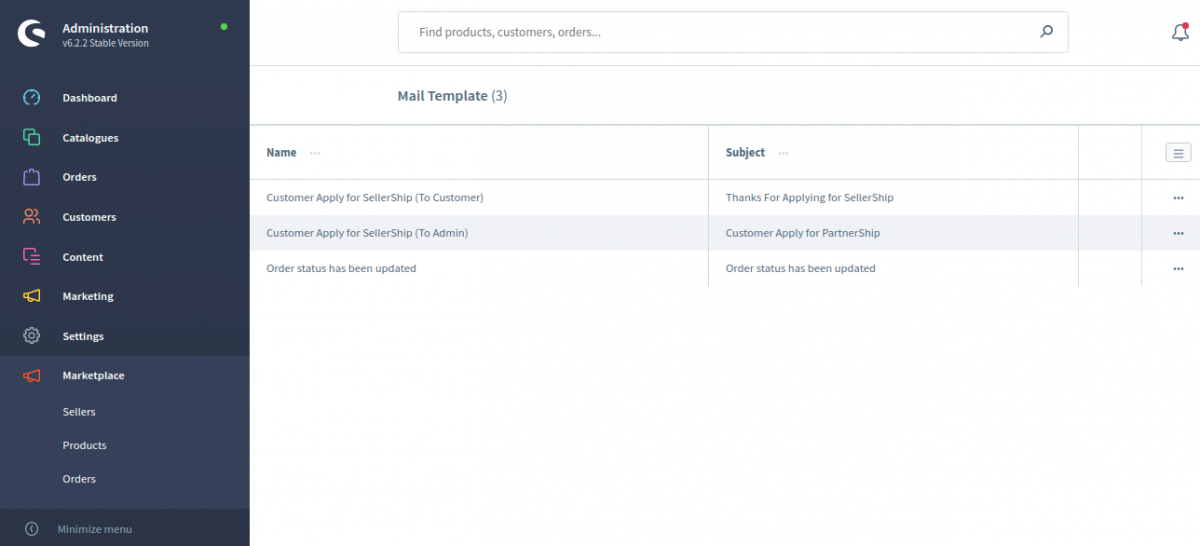
Mail Template
Under the mail section, the admin can create/delete the Mail messages for the default conditions of the Marketplace, the admin can set the mail for different conditions that will occur in the marketplace.
This mail will come only when anyone installs the plugin, it can be edited by admin and can be saved. Also when a customer will become a seller, then a mail has sent to the admin and seller both.
When a seller change the order status, then a mail automatically sent to the customers.
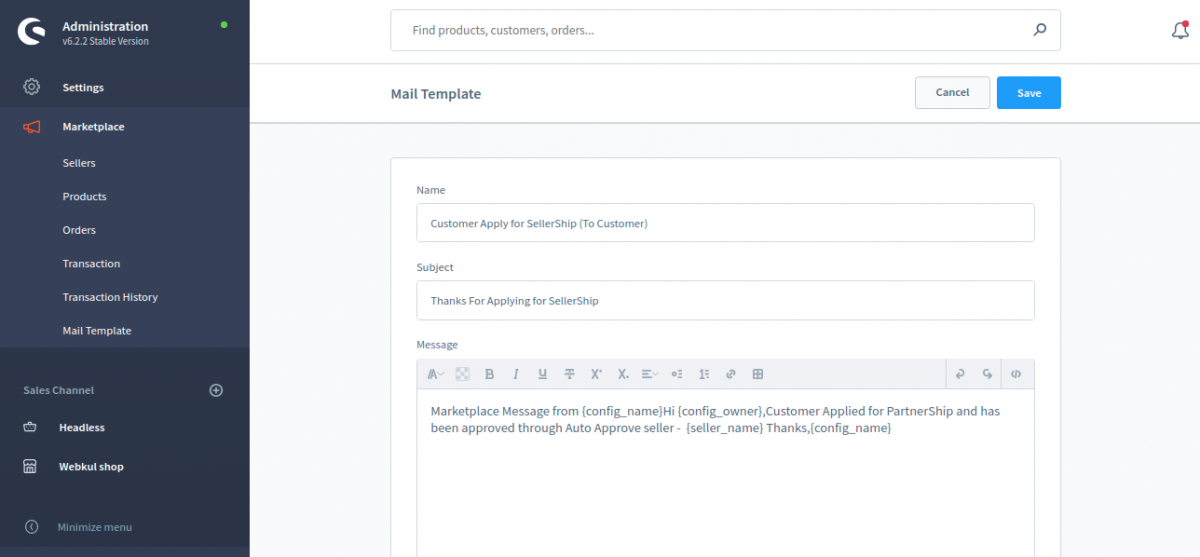
Admin can click on the edit (…) button on any mail. In this page, the admin can change the mail templates.
Shopware Multi-Seller Marketplace Front-end
After the installation of the Shopware6 multi-seller module, there will be an icon “Marketplace” on the right side of the screen.

The customer can click on the Marketplace Sellers icon under the Marketplace. After that, the customer will be able to see all the marketplace sellers registered at the marketplace.

The customer can see the details of the seller after clicking on the seller profile.

Here the customer can see the seller details like these:
About – Here the customer can check about the seller.
Products – Here the customer can see the seller products and details.

Reviews – Here the customer can check the seller reviews.

The customer can also login to review the seller. The customer can enter these details:
- Ratings – The customer can rate the seller in the marketplace.
- Summary – The customer can also add a summary of the review.
- Review – The customer can add a review of the seller.

Social Links – Here the customer can check the seller’s social media profiles.

Shopware Multi-Seller Marketplace Seller Login
The customer can register himself/herself at the Shopware multi-seller marketplace after clicking on the Register button at the front-end. If the customer already registered at the Marketplace then he/she can click on the login button.

After clicking on the “Register” Button the customer can see the registration page. Here the customer can enter his/her details.

The customer can become the seller after selecting the “Yes” option in the “Select “Yes” if you want to become a seller and sell your products on the store.“.
After the registration, the seller can log in to the Shopware multi-seller Marketplace.

After the login, the seller can see these seller’s options.
- Add Products
- Your profile
- Your orders
- Marketplace Sellers
- Your Products

Marketplace Dashboard
After login, the Marketplace dashboard will appear as shown in the below snapshot.
After clicking on the dashboard, the seller can see the complete statistics for his store account. The seller can see the –
- Pending orders quantity
- Number of orders in process
- Complete orders quantity
- Number of order canceled
Moreover, the seller can also see the following details like:
- The total number of orders that have been placed by the customers.
- The total number of Turnover
- Total number of logged-in Buyers,
- Low Stocks

Your Profile –
The seller profile displays critical information about the seller. After the registration, the seller needs to complete the seller profile. The seller can manage the profile under “Seller Profile”. The seller has to enter these details.
Once the seller enters all the details in the profile, the user can access it from the product page.
- Store Logo
- Store Banner
- Social links
- Store Owner
- Store Slug
- Owner Name
- Store Title
- Store Description

The seller profile and rest of the pages will be display on front-end as below images:

Add Products –
The seller can add the product at the Marketplace. The seller has to enter these details to create the products.
- Product name
- Price
- Product Number
- Product Stock
- Description
- Product Tax
- Product Manufacturer
- Media Files
- Product categories

After saving the products, the seller can see the products in the marketplace seller’s products grid.
Your Products –
Taping the Add Products menu option brings up the section to add the products. Here the seller can easily add in his products. The seller can see all the products created by him/her.

For delete the product, seller can click on the particular product and delete it.

The seller can add a new product here and also edit the product. To edit the product, the seller has to click on the “Edit” button. Here the seller can see the options.

Update Product – Using this option, the seller can update the created products.
View Product – The seller can click on the “View Product” to check the product on the product page. On the product page, the seller can also see his/her details.

Variant Generator – The seller can add/generate the variant of the product here.
For creating the variant, the seller can select the “Product Groups” after that the seller can see the seller group option for creating the product variant.
For example: If the seller will select the “Colour” product group then he/she will be able to see the “Group Options” like “Green”, “White”, “Blue”.

After that, the seller can click on the “Update Variant” to generate the variant products.

Here the seller can edit the details of the variant products –
Price – The seller can change the price of each variant product.
Stock – The seller can change the stock of each variant product.
The seller can click on the “Update” button to update the variant products. The seller can also delete the variant product. After the changes, the seller can see the product at the front-end like this.

Your Orders –
Now, clicking the Orders menu option will bring up the section to view all the orders that have been placed for this Sellers products. The seller can see these order details:
- Date – The seller can see the product order date by the customer.
- Order Number – The seller can check the order number.
- Order Status – The seller can check the order status.
- Payment Status – Ther seller can check the payment status like open/closed.
- Action – The seller can perform the action View and Hide the order details.
Clicking the “Order” link under the column View will allow the seller to view the complete order details.
- Customer name
- Customer email
- Payment Method
- Shipping Method
- Commission Amount
- Seller earnings
- Total amount

Marketplace Sellers –
With this option, the seller can check all the registered sellers and his/her details in the marketplace.

If you are looking for the multi-vendor module for Shopware 5 then please check this link – https://webkul.com/blog/shopware-multi-vendor-marketplace/
Support
That’s all about our Shopware multi-seller marketplace module. If you have still any query, please create a support ticket at- https://webkul.uvdesk.com/en/customer/create-ticket.

Current Product Version – VERSION 1.1.1
Supported Framework Version – Shopware 6.2.0 and 6.2.2
[/expand]


 Voraussichtlich verfügbar ab Juli 2020 Dieser Hersteller reagiert schnell auf Supportanfragen

